
A cutting-first guide to home laser cutter machines: which materials a compact machine can actually cut through, what power class each project needs, how ventilation and fire awareness differ from engraving, and where the honest limits of benchtop cutters sit.
Home cutting guide
Most articles about a home laser cutter machine spend their time on engraving photos, logos, and coasters. Cutting is a different job. Engraving leaves a mark on the surface; cutting has to drive a kerf all the way through a sheet, drop the piece free, and leave an edge you can use. That means the machine needs enough optical power for the material thickness, enough airflow to clear smoke from the cut, and enough fire awareness on your side to keep thin stock from catching flame.
If you want cutting capability rather than decoration, this guide maps realistic home cutting projects to the machine class each one actually needs, covers ventilation and cleanup for cutting specifically, and states the honest limits of compact benchtop machines.
The short version

- A 3W to 5W class diode machine handles cardstock, paper, thin leather, and very thin plywood at the low end of its range.
- Through-cutting 3 to 5 mm plywood reliably asks for more optical power than most engraving-first buyers expect.
- Cutting produces far more smoke and fume than engraving and needs active ventilation, not just an open window.
- Small workpiece areas are the real constraint on a bench: the working envelope decides what project you can lay out, not the laser head.
Engraving at home is crowded ground; cutting is where machines separate
An engraving project only needs the beam to mark the top layer. A cutting project needs the beam to remove material through the full thickness, which means the deeper you go, the more the cut quality depends on power density, focus, air assist, and pass count. Two machines that look similar in a product photo can behave completely differently the moment you ask for a through-cut.
That is why "does it cut?" is the wrong question. The useful question is: how thick, in which material, and how clean does the edge need to be? A machine that will cut 3 to 5 mm plywood will also cut cardstock quickly; a machine that cuts cardstock beautifully may not get through 5 mm plywood at all.
Which home cutting projects are realistic
The table below maps common home cutting projects to the power class and working area they generally require. Treat the power column as the minimum class to plan around, not a guarantee for every sheet of a given material — density, glue content, and moisture all change how a sheet cuts.
| Project | Typical material and thickness | Machine class to plan around | What decides success |
|---|---|---|---|
| Greeting cards, paper craft, stencils | Cardstock and paper, thin | 3W class | Focus and speed; the cut is fast, so fire risk comes from dwell time |
| Leather tags, keyfobs, small patches | Thin leather | 3W to 5W class | Airflow: leather fume is heavy and the cut edge darkens without it |
| Small acrylic shapes, thin panels, coasters | Thin acrylic pieces | 5W class and up | Pass count and edge finish; acrylic melts rather than chars |
| Thin plywood shapes, laser-cut models, small boxes | Plywood at 3 to 5 mm | 10W class and up | Power plus air assist; thicker sheets may need several passes |
| Repeated small parts, assembly sets, batch craft runs | Mixed thin stock | 10W to 20W class | Working area and repeatability across a batch |
Two things stand out from that table. First, thin plywood at 3 to 5 mm is the practical upper boundary for a compact home cutter; beyond it you are asking a lot from a benchtop diode machine. Second, the working area matters as much as the power. A small envelope limits you to small parts, no matter how strong the head is.
Matching a machine to the project, not the other way round
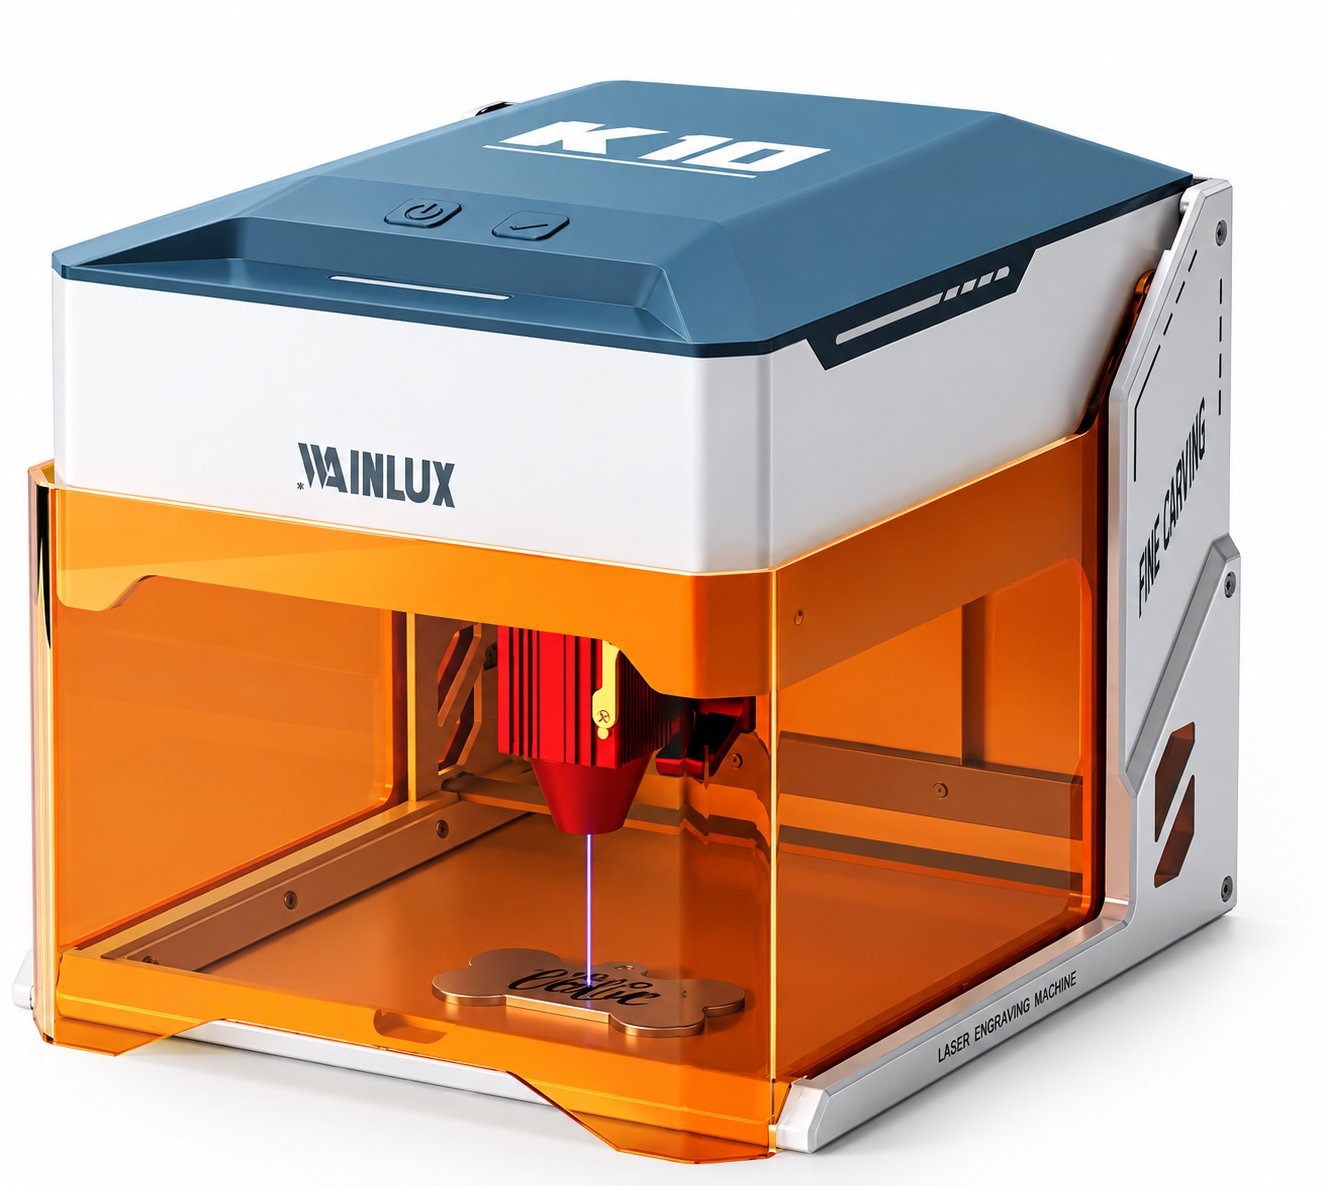
Look at how the working envelope changes what each class of machine can attempt. A compact enclosed unit such as the WAINLUX K10-5W pairs a 455nm 5W head with a fully enclosed body and a tinted shield, and is rated to cut 3-5 mm plywood — a reasonable fit for cardstock, thin leather, and small plywood pieces. It connects over WiFi, PC, or offline operation, so you are not tied to a cable while running a cut job.
If your project list includes more than one material family, dual-head machines cover more ground. The WAINLUX X1-20W combines a 455nm head and a 1064nm head (20W class) across a 30 x 30 cm working area, which suits larger layouts and repeated small-part runs. Smaller dual-head options exist too: the WAINLUX F1 pairs a 455nm 10W head with a 1064nm head in a 10 x 10 cm area, and the XN001-3W covers 9.8 x 8.8 cm. The area figure, not the wattage, often decides whether a given project fits at all.
Through-cuts need three things: power, airflow, and attention
These are the three variables that separate a clean cut from a scorched one.
Power and pass count
Cutting thick stock on a modest machine usually means multiple passes rather than one heavy pass. More passes mean more heat accumulated in the same spot and more time for the material to smolder, so the trade-off is not free. Plan projects around the material thickness the machine is actually rated for rather than pushing it with repeated passes.
Airflow
Cutting vaporizes material along the kerf and produces far more smoke and fine particulate than surface engraving. Air assist blows smoke out of the cut, which improves the edge and reduces flare-ups. Ventilation then has to move that smoke away from the operator. An open window is not ventilation; for regular cutting you want an extraction path or a well-placed fan moving fume outdoors, and you should not run a cutting job in a closed room.
Fire awareness
Thin, dry, and paper-based materials ignite easily because there is little mass to absorb heat. Never leave a cutting job unattended, keep a fire-safe surface under the machine, and know where your extinguisher is before you start. Enclosed machines add a physical barrier, but an enclosure is not a substitute for supervision.
Safety note: Never run a cutting job unattended. Ventilate to the outdoors rather than recirculating fume into the room, keep combustible loose material away from the machine while a job runs, and treat every new material as a test cut until you have seen how it behaves. Stop the job if you see flame rather than a bright cut point.
Your first cutting session, in order
Engraving and cutting share a machine but not a setup. Run the first session in this sequence so a failed cut does not turn into a fire or a ruined sheet.
- Confirm the material and thickness against the machine's rated cutting range, and set aside anything thicker for a different tool.
- Set up ventilation first — extraction or a fan moving fume outdoors — and verify air is actually moving before the head moves.
- Focus the lens on the material surface and re-check focus after any change to material or bed height.
- Run a small test coupon at the settings you plan to use, and inspect whether the piece drops free cleanly instead of needing to be pushed out.
- Adjust pass count or speed one variable at a time, watching for smoke buildup and any glow along the kerf.
- Stay with the machine for the whole job, and inspect the cut edge and the bed for debris afterward.
Ventilation and cleanup: the cutting-specific chores
Cutting generates two waste streams that engraving mostly does not: airborne fume and solid debris. Fume is handled by extraction. Debris collects as charred dust and resin on the bed, in the honeycomb, and around the lens area, and it accumulates faster on cutting jobs because you are removing material rather than marking it.
A practical cutting routine looks like this: clear loose debris from the bed after every session, wipe residue off the cutting bed before laying down a light-colored material, and check that the extraction path is not clogged with particulate. Smoke residue also settles on the inside of any shield or window, so keep it wiped so you can actually see the cut in progress. Cleanup is not cosmetic here — a bed loaded with charred dust is a fire risk on the next job.
The honest limits of compact machines
Benchtop cutters are genuinely useful, and they are also genuinely limited. The limits show up in four places.
- Thickness. Thin plywood up to roughly 3 to 5 mm is the realistic ceiling for the compact class; hardwood, thick acrylic, and metal are outside what these heads cut.
- Area. A small working envelope — 9.8 x 8.8 cm, 10 x 10 cm, or 30 x 30 cm depending on the model — limits you to small parts or tiled layouts.
- Speed and finish. The same cut that takes seconds on a larger machine may take several passes and leave a darker edge here.
- Duty cycle and environment. Long cutting sessions in an unventilated room are not a good fit for compact machines or the people running them.
None of that rules out home cutting. It does mean choosing projects that match the machine: small parts, thin stock, and a layout that fits the envelope. If a project needs thick hardwood or a 60 cm panel, it is not a benchtop job, and no amount of pass-count tuning will change that.
Choosing between single-head and dual-head for cutting work
If cutting is your main goal, the 455nm head is the one doing the work, and its power rating should be the first number you compare. The 1064nm head on a dual-head machine serves other materials and tasks; it is not a shortcut to cutting thicker plywood. Buy the working area and the cutting power you need first, and treat the second wavelength as a bonus for materials you may work with later.
WAINLUX has manufactured laser equipment since 1998, with more than 25 years of production behind the current range, an ISO9001 company-level certificate, and OEM/ODM support for buyers who need custom configurations. Units ship to more than 50 export countries, so spare parts and consumables can be sourced through an established channel rather than a one-off storefront.
Questions buyers ask before their first cut
Can a home laser cutter machine cut 5 mm plywood?
Yes, at the top of the compact class — the K10-5W is rated for 3-5 mm plywood. Expect multiple passes at the thicker end, and inspect the test piece before running a full set.
Do I need air assist to cut, or only to engrave?
Cutting benefits most. Air assist clears smoke from the kerf, which improves edge quality and reduces flare-ups, and cutting produces more smoke than engraving does.
Is an enclosure enough for safety?
An enclosure and a tinted shield are useful barriers, but they do not replace supervision or outdoor ventilation. Stay with the machine through the whole job.
Which working area should I choose?
Measure the largest part you plan to cut, then pick an envelope that fits it: 9.8 x 8.8 cm, 10 x 10 cm, or 30 x 30 cm depending on the model. Area decides layout, power decides thickness.
Tell us what you want to cut
If you are weighing a home laser cutter machine for cutting rather than engraving, the fastest way to a useful answer is to describe the material, the thickness, and the size of the largest part. That single combination tells us which power class and working area fits, and we can point you to the model that matches it.
Founded in 1998 and supporting OEM/ODM programs across more than 50 export countries, WAINLUX can quote the cutting head and area that fit your project list. Send us your material and part size for a model recommendation.